Build Your Dream
Come fellow ether travelers — sit. Let me tell you a story, not a how-to story, but a what-happened-to-me story.
Several years ago, my family and I moved into our new home, our home. Things were tough; working all the overtime I could get, making our first ever mortgage payment and raising our two children.
My station then was a 100 W transceiver and a 40 meter vertical antenna. Since there were no trees on this former grass strip air field, the vertical was my only option. I often referred to this vertical as my “inverted ground rod” antenna.
Operation then was fun and I worked a lot of stations. Working DX wasn’t so much fun. Oh, I was able to work the “garden variety” DX stations in Europe and South America but when a real DX station hit the air, I found myself at least 30 down on the pile. It was normal for these DX stations to either fade out or leave the air before I worked my way to the top.
These “things” had to change. The vertical had to go. During the next 3 years I was able to acquire 50 feet of Rohn tower, a Hy Gain Ham IV rotator and the necessary hardware to erect the tower. The fourth year I bought a Hy Gain TH-6DX beam. During these 4 years I was able to dream and the frustrations were under control. Sue Atchley Ebaugh once said, “Within our dreams and aspirations we find our opportunities.”
I finally got everything together and in the air and now my hamming took on a whole new aspect. I went from 30 down in the pileup to 15 or 10. I was working DX better than I had for years. But something was still missing.
One cold winter evening, late at night, I found myself in my easy chair, shoes off, TV off, a cup of hot coffee in one hand, listening to the icy wind blow past the window. It reminded me of a time many years before in southern Germany when I first got my ticket. My shack was in the control tower of a former Luftwaffe air field. The rig was a World Radio Laboratories Globe King 400B transmitter, running 400 W AM and the antenna was a Cubical Quad. It was 1956 and the sunspot cycle was at the all time recorded high. The world was at my finger tips. This was the way I always dreamed ham radio to be. I wanted to experience this again.
Brute Force and “Ignernce”
Then a voice came to me, a voice of an old friend who had long since passed on. Ward was a master mechanic who lived “over in the holler.” One day he was trying to break loose a rusted nut on an engine and had to put a 3 foot “cheater” on the wrench. He looked at me and said in his slow West Virginia draw, “Teeee-am, when everythang else fails, ya gotta revert to brute force and ignernce.” He was one of the few that addressed me by my nickname, Tim. I have never forgotten his advice and I have found it necessary to apply it on more than one occasion. Brute force equals power. I needed a linear amplifier! I slept well that night, in spite of the coffee.
The next day I started looking at amplifier ads in QST and ordering information from amplifier vendors. I was immediately plunged into state of despair. The prices were all beyond what I could possibly afford. After sulking and feeling sorry for myself for a few days, I started to research homebrew amplifiers in the ARRL Handbooks. If I couldn’t afford a “store boughten” amplifier, then the only thing left was to build one. It could be built over time with no major cash outlays.
I located a very promising amplifier to build in the 1970 ARRL Handbook. It was called the “HB-70-2,” for Home Brew-1970-2KW.1 Parts count was low, wiring was simple — I could do this.
So, I started to accumulate parts. Since I live in the boondocks of West Virginia, this part wasn’t so easy. My major source of parts became the one annual hamfest that I was able to attend and two old friends who waited too long to build their dreams. I accumulated parts for 5 years — 5 long years. But now I had a new dream, a goal. This dream was on my mind constantly, calculating, accumulating, planning the layout, acquiring and reading amplifier manuals, planning improvements even before a hole was drilled. In the meantime, the TH-6DX was doing its magic. I was in the game. I was winning a few, losing a few.
Time to Turn On the Iron
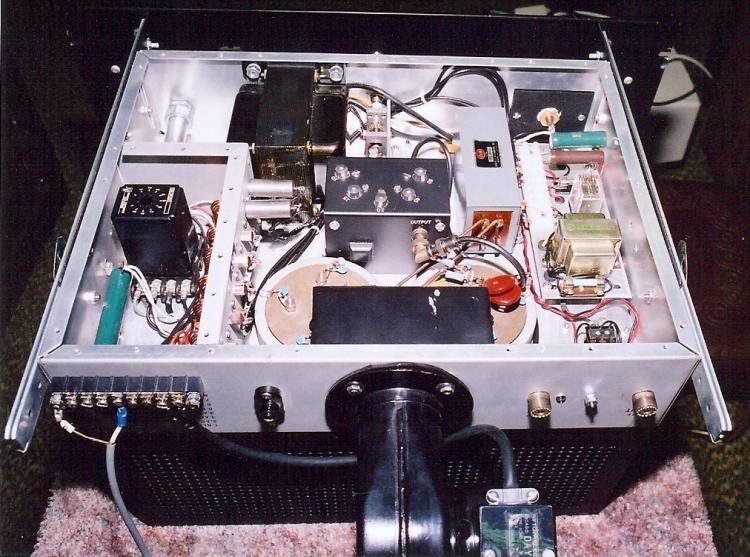
Finally, the time came to start. The Bud chassis was brought out and the layout on the top was started. Components were shifted around on the chassis top like chess pieces until an arrangement was found that would work. Component outlines were drawn on the Kraft paper that covered the Bud chassis. Then I focused on the component placement under the chassis. This proved to be more challenging because by this time, the original parts count plus the “improvements” had reached critical mass.
I mounted the filament transformer, an impressive hunk of metal, under the chassis. The filament choke had gone from two short ferrite rods to a B&W FC-30A, which is about 4 times bigger. A wind box was added to provide air distribution to the Eimac aluminum air sockets. A compartment was added to house the RF filters for all ac and control wiring, and a box was added to house the input tuned circuits.
A time delay relay was added to provide step-start for the tube filaments and when the power supply construction was started, step-start on the HV was also incorporated. Once I started this project it seemed to take on a life of its own. I learned that the planning, the accumulation of parts and the actual construction are the real fun of building your own gear.
During all of this planning and fitting, one problem was always present in the back of my mind. Where do I get perforated aluminum sheets for the RF cage and bottom cover? I was never able to find material that I deemed suitable for this. Once again, I realized that the only way to get the correct size sheets I needed was to make them. I was able to find small sheets of aluminum from a mail order surplus outlet for a very reasonable price. Two weeks later, I had a small stack of aluminum in hand and was now ready.
In the meantime, Mrs Claus, aka, “My wife,” presented me with the perfect Christmas gift. It was a floor model drill press. The timing was also perfect because the first week of the New Year I was on vacation and it was time to try my hand at making perforated aluminum sheets from solid sheets.
Letting Some Air In
Monday morning, the first order of business was to make a template from sheet steel by laying out, very accurately, a grid that just happened to provide 391 — 1/4 inch holes. The reason for this size was that the pattern looked right and fit my aluminum sheets the way I wanted.
I then used this steel template as a guide for drilling the holes in my aluminum panels. After examining the first panel I was very encouraged. I would drill and deburr until the holes started to move around and spill onto the floor. Then I would quit, drink some coffee, pet the dog, thank my wife once again for the drill press and go back to it. This went on every day for most of the week.
The final hole count was 3138 — 1/4 inch holes. But that isn’t the hole story on that. (Sorry) It was necessary to drill 3138 — 1/8 inch pilot holes first and then the 1/4 inch finished hole. So the total count was 6276 holes! But, it didn’t stop there. Each hole had to be deburred, on each side. This process was more intense than the hole drilling because I couldn’t use a template. One slip and that piece would be ruined. If one was to count each deburr as the equivalent to a hole drilled, the final count would be 12,552, or 1 week vacation time.
I have spent some time explaining this because it proves one thing: Patience, innovation and determination can trump a lack of money or material in many cases. Oh yes, out of the 3138 holes I had only a few minor “boo-boos” and only one “Awwww shhhhhhhucks!”
If You’re Going to Do It, Do It First Class
Looking at the top of the chassis, you can see that I opted for vacuum variables for both the tune and load controls. Most top end linear manufacturers use a vacuum variable for the tune control and a standard variable capacitor for the load control. I found my vacuum variables at the one hamfest I attended for a very reasonable price. Someone once said, “It costs only a nickel more to go first class.”
The front panel went from two meters and a multifunction switch to save money to the original design using three meters. Not just three meters but three new Triplett 320-GL/B meters. First class. I was now hooked, possessed if you will, with the idea of building a first class linear, no matter how long it took.
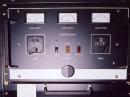
The three panel switches are illuminated rocker switches: green for filaments, amber for standby/operate and red for high voltage (HV). They are interlocked so that no power can be applied out of sequence. I installed a little indicator light at the top of the filament switch to show the timing of the filament voltage. It goes out when full filament voltage is applied and only then does the green filaments switch light come on.
The power supply is, for the most part, the same as shown in the ARRL Handbook.2 The main exception is that I used two K2AW HV rectifier modules instead of two long diode strings. I use two ganged Variacs in the 240 V ac primary circuit to run low power, if I wish. The primary voltage is metered.
The Final Touch
A note about the black paint used on this linear. I’m not that fond of black paint but this paint is the most incredible aerosol paint I’ve ever used. It is Derusto Heat Master Enamel, BBQ Black #760. It’s almost impossible to mess up a job with this paint. About the only goof one can make with it is to let it run.
Otherwise, the paint goes on evenly and has no highlighted patches or overspray roughness. As for durability, I had the front panel silk screened, after I cut all the necessary holes and painted it. The printer messed up the silk screen job three times and washed the wet, white paint off the panel with gasoline each time. I almost stroked out because I thought the gasoline would ruin the black paint. I was also expecting the whole place to blow up! Neither one happened. The gasoline never fazed the paint. Looking back, I’m not sure which worried me more.
Getting Slugged
Up to this point, I had 5 years in accumulating parts and another year building the amplifier. It was time to light it off. I did, and it didn’t! I couldn’t get enough drive. The input circuit was made from slug tuned cores that I had acquired at the hamfest. I wound and rewound them over and over. I made absolutely zero progress.
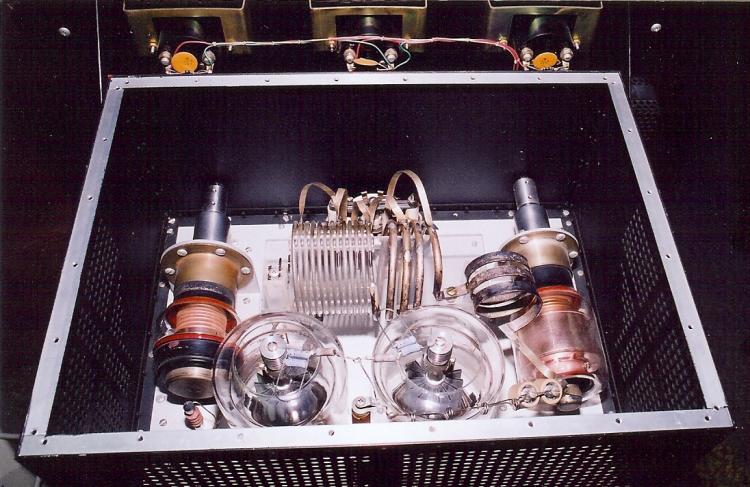
After a month of fooling with this thing, each time making me a nervous wreck because I was afraid of ruining my brand new 3-500Z tubes or maybe something arcing over. I guess I was also intimidated by the HV. I gave up. I was defeated and totally disgusted. My “dream” became a big black pile of junk that mocked me every time I went into the shack. My “masterpiece” was now my monument to failure. Perhaps I was just burned out on this project. I’ll never know.
It sat there for 3 years and then one day I saw a set of Heathkit SB-220 linear amplifier input coils for sale. I bought them, ripped out the hamfest specials and installed the Heath coils. This time when I applied drive, I heard music, trumpets and applause as they say; the currents came up, a bit of tweaking on each band and my “masterpiece” was putting 1400 W through my Bird wattmeter into a dummy antenna. Tuning was as smooth as silk on all bands. Monitor scope patterns indicated excellent linearity. I had to go for it.
Light Up the Night
I then switched to the now TH-7DX beam, swung it toward Europe and tuned to a German station calling CQ. I gave him a short call and he came right back. He gave me a report of 20 over on voice peaks. After that, signal reports started flowing in; “Wow, What a signal;” “Sounds great Al,” and on and on. I was in ham heaven. And for the first time, I had DX stations calling me. I worked Europe until the band went out. Every contact but the first was with stations that called me, one after the other. What a feeling.
So now boys and girls, when I swing the beam onto a DX station, give them a call, call again, perhaps even a third call, I then push the amber rocker switch. Ward was right. “When everythang else fails ya gotta revert to brute force and ignernce.” Sometimes.
For an incredible experience, build your dream before it’s too late. Whether it be small or large, just do it. Even if it takes 6 years.
All photos by Allen Poland, K8AXW.
Allen Poland, K8AXW, an ARRL member, has been a ham for 52 years. He obtained his Conditional class license and call K8AXW while stationed in Bad Aibling, Germany. His German call was DL4TPO and Allen also held the call K8FKA for several years while living in Maryland. He presently holds Amateur Extra class and First Class Radiotelephone licenses. His main interest in ham radio has been building equipment. He is now retired from the Westvaco Corporation, Luke Mill, after working 40 years as a power plant operator. You can reach him at 1335 Ludwich St, Keyser, WV 26726 or at k8axw@arrl.net.
1 “The HB-70-2 Amplifier,” The 1970 ARRL Handbook for Radio Communications (Newington: 1970), pp 201-204.
2 “A 3000-Volt Power Supply,” The 1970 ARRL Handbook for Radio Communications (Newington: 1970), pp 330-332.
Allen T. Poland Jr, K8AXW
Photo Gallery
-
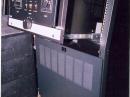
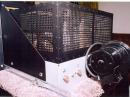 A rear view of th...
-
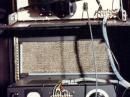 The BUD computer ...
-
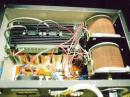 A top view of the...
-
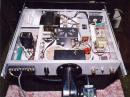 A bottom view of ...
-
 A top view of the...
-
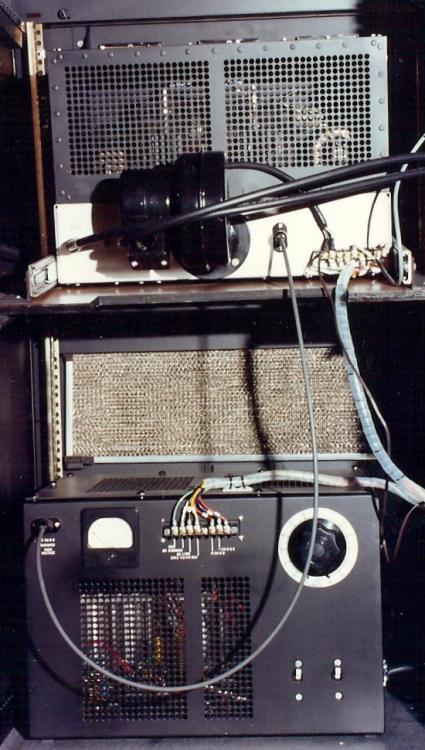
 The amplifier and...
-
 The amplifier’s f...
-
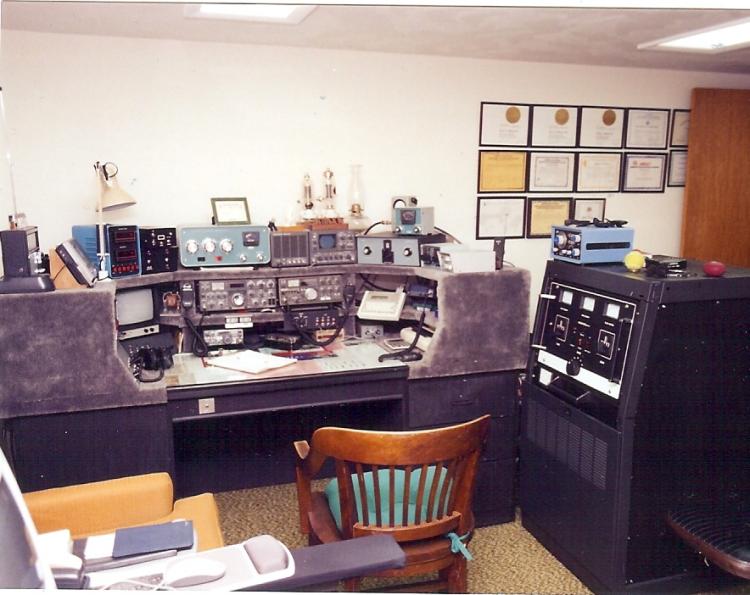
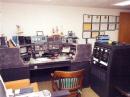 Allen’s shack wit...


Back


