Using Stamps to Enhance Your ARRL Awards
Tim Pearson, K5AC
Add color and curiosity to your award displays.
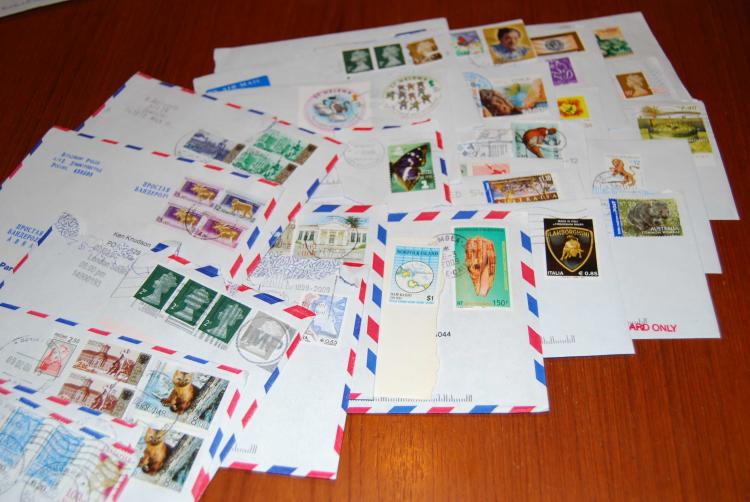
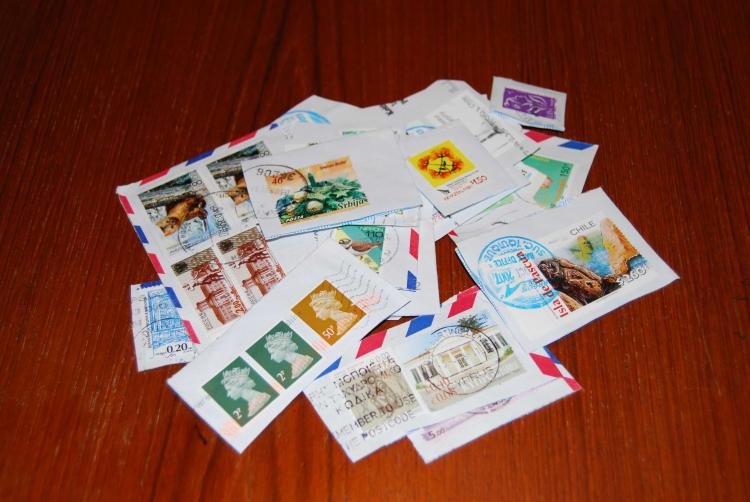
So you have been DXing and QSLing for a while and have amassed a pile of envelopes with foreign stamps and never knew what to do with them (see Figure 1)?
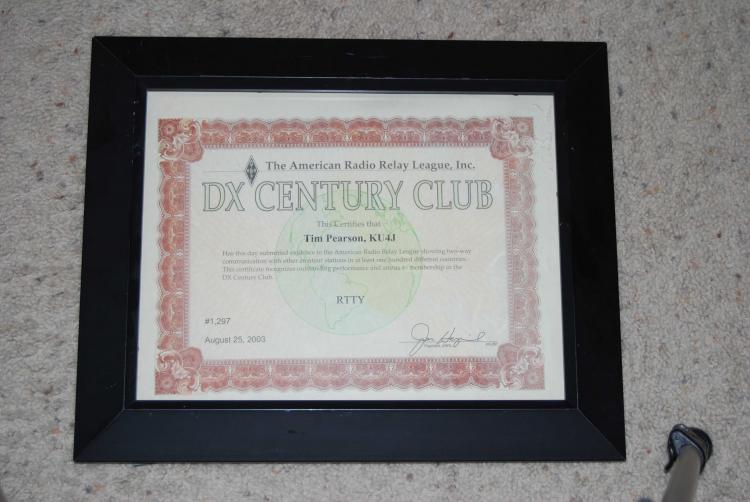
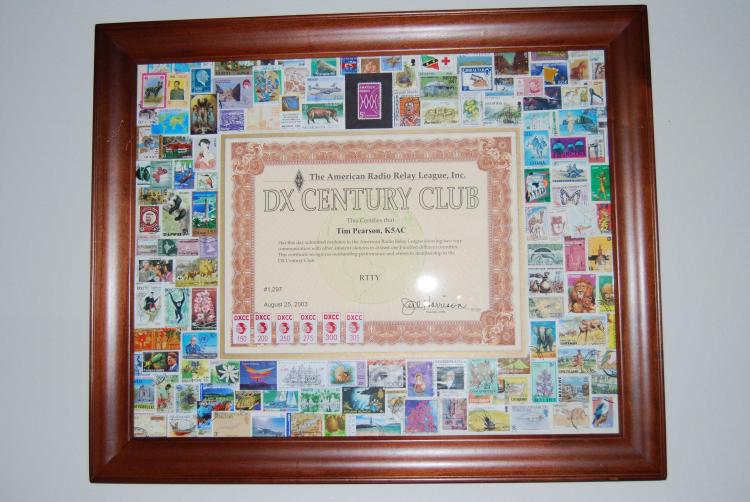
You have a DXCC, WAS or some other favorite award and you want to go from plain (see Figure 2) to snazzy (see Figure 3)?
Over the years I have been a pack rat and have collected envelopes and stamps from well over 200 different countries. I always had good intentions to do something with the stamps. This past spring I finally put a plan into action to make a display that would combine my DXCC certificate and all the stamps I have collected over the years. If you don’t happen to have enough stamps; many hobby stores also sell packages of foreign or domestic stamps for a reasonable price.
You don’t have to limit this approach to just foreign stamps and DXCC. The same idea could be applied to a WAS or VUCC using domestic stamps or any combination. The color of the collage of stamps would make any of your prized awards go from ordinary to eye popping. All of the materials can be purchased at your local hobby or craft store for less than $100.
To liven up your award you need the following materials:
• Frame for 16 × 20 inch photograph
• Top mat: Hobby Lobby #H12522 (muted yellow)
• Bottom mat: Hobby Lobby #H8007 (brushed gold) 1/4 inch width
• Acid free backer board
• Krylon “Easy-Tack” spray adhesive
• A tweezers
• Lots of stamps
• Your favorite ARRL award
Getting the Stamps Off the Envelopes
To remove the stamps from their envelopes you will need the following items:
• Bowl
• Warm water
• Wax paper
• Something heavy and flat
Cut the corner off of the envelopes (see Figure 4) that have the stamps attached. You want to remove the stamp from the envelope without damaging it. Soak about 15-20 stamps in a bowl of warm water for about 3-5 minutes (see Figure 5). At the end of that time the stamps should easily come off of the envelope paper. If the stamps do not fall off continue to soak them for a few more minutes.
Once the stamp is off the paper, place it on wax paper that is laid out on a flat surface (see Figure 6). Place all of the stamps on the wax paper then cover them with another piece of wax paper. Next place a heavy flat item (book, piece of wood, etc) on top of the “stamp sandwich.” Let the stamps completely dry. This may take a few hours or even a day. Repeat this process using 15-20 stamps each time until you have enough to surround your DXCC. In my case this was approximately 200 stamps.
Carefully remove the stamps from the wax paper; the stamps should be completely flat and dry. If some have curled or are not flat use a dry iron to try to flatten them. Iron the back of the stamp so as not to damage its face.
Choosing a Mat and Frame
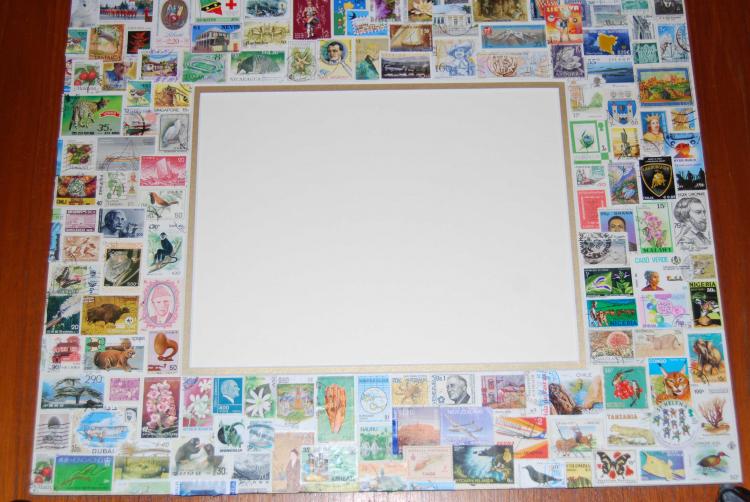
The DXCC certificate is 8.5 inches high and 11 inches wide. I picked a mat that would fit into a 16 × 20 inch frame. This will give you a 3 to 4 inch border of stamps around the DXCC certificate. I picked a double mat with beveled edges and a contrasting color (white/gold) so that it would emphasize the DXCC certificate and the stamps and certificate would be on different layers. I purchased the mat and frame from Hobby Lobby (www.hobbylobby.com). I took the DXCC certificate into the store and the sales person was able to cut the mat to fit my certificate perfectly. Make sure that the frame you select will fit the thickness of the mat.
Arranging the Stamps
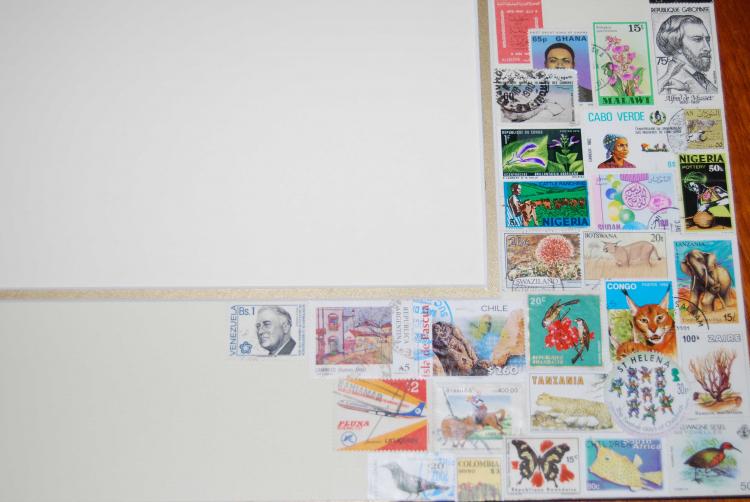
The next step is the most time consuming but the time spent will be well worth the effort. Stamps come in many different sizes, shapes and colors; arranging them on the mat is like working on a jigsaw puzzle. You should start at the edge of the mat closest to the award and work your way outward (see Figure 7). The outer 1/2 inch of the mat will likely be covered by the frame. The goal is to have complete coverage with stamps so that there is no white space showing. It is okay to overlap stamps; they do not have to line up edge to edge. You can plug small holes with pieces of a stamp if necessary. I’m a type-A kind of person, so I arranged my stamps by continent and placed them on the mat as I would see them on a map. You may not want to invest that much time and effort.
You will first want to do a dry placement (no adhesive) to get the stamps arranged to your liking. It is better to start on one inner side and work your way around the mat. There was one stamp that I wanted to emphasize so I cut a piece of black construction paper slightly bigger than the stamp. I placed the construction paper on the mat and then centered the stamp on top of the construction paper. The stamp that I emphasized was the US 5 cent 1964 Amateur Radio commemorative. I placed this stamp at the top middle of the mat. If you have some favorite stamps you might want to try this in multiple places.
Attaching the Stamps to the Mat
This is where a true philatelist (stamp collector) would probably cringe. Stamp collectors typically use stamp hinges to attach stamps to paper. The stamp hinges are tiny adhesive flaps that you moisten and attach to the stamp and to the paper. If you wanted to use this method to attach 200 + stamps to the mat it might take a long, long time and it would be very hard to make any minor adjustments.
I was looking for a mat that had a “Post-It” like adhesive already on it so that I could easily place, remove and rearrange stamps, but I could not find a product that fit the bill. I did find a spray-on adhesive that stayed tacky for several minutes, which is what I ended up using. The adhesive was Krylon Easy-Tack, which was purchased at Hobby Lobby. Make sure that you spray only the mat and not the award. It is best to remove the backer board and award from the mat while you are spraying the adhesive and placing the stamps.
Spray the adhesive on a small area of the mat and then arrange 15-20 stamps on the sticky area. You will need to work quickly but if you mess up it’s easy to remove a stamp with tweezers and reposition it. Repeat this process as you work around the edges of the mat until all of the stamps are placed and there are no white areas from the mat exposed. The goal is to have 100 percent stamp coverage on the mat (see Figure 8). Allow this to dry completely for several hours before placing the mat over the backer board and placing it in the frame (see Figure 9).
All photos by Tim Pearson, K5AC.
Tim Pearson, K5AC (ex KU4J), an ARRL member, is a senior principal software engineer in Fort Worth, Texas. He is an Extra class operator and has been a ham for 34 years having first been licensed in 1975 as WN4AXN, WB4AXN and later as KU4J. Tim participated in the February 2009 K5D Desecheo Island DXpedition and has participated in many contest expeditions (W4NT/C6A, ZF2CN, FMØAB, VP5EE,VP2VFP, PJ9T, V47Z, J37H and J3A).
Tim is past president of the Vulcan DX Club (Birmingham, Alabama), North Alabama DX Club (Huntsville) and the Lone Star DX Association (Dallas-Fort Worth, Texas). His current passion is RTTY DXing and has confirmed 310 countries in the past 6 years.
Tim enjoys backpacking, tennis, sailing (R/C and real,) scouting and tinkering with embedded computers. Tim is married to Reena and has two children, John-Michael and Daniel. He can be contacted at 4200 Bridgeview Dr #1328, Fort Worth, TX 76109.
Photo Gallery
-
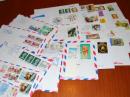 Figure 1 — My col...
-
 Figure 2 — My DXC...
-
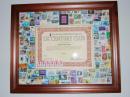 Figure 3 — The D...
-
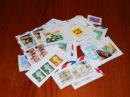 Figure 4 — Cuttin...
-
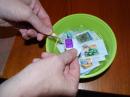 Figure 5 — Soakin...
-
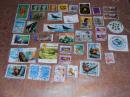 Figure 6 — Prepar...
-
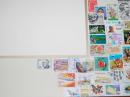 Figure 7 —The ini...
-
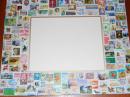 Figure 8 — The co...
-
 Figure 9 — The fi...


Back


