Knit Earpad Covers for Headphones
Daniel Rosenne, 4X1SK
14 May 2021
Radio amateurs using over-ear headsets are familiar with the earpads getting sweaty and eventually damaged after prolonged use.
Zippi, my spouse, is an avid knitter, and offered to knit a pair of covers. Although I was skeptical about the idea, the result was a very pleasant surprise. They fit snugly over the earpads, and they have a pleasant texture, even better than the original covers. The knitted covers are made with 100% cotton, making it stretchable and soft. You can also easily remove and wash them, which is a great benefit.
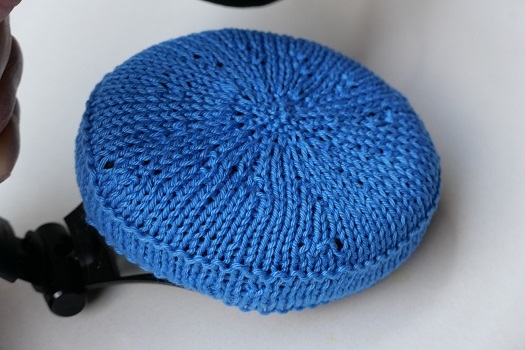
Figure 1 — The finished cover.

Figure 2 — The back side of the finished cover.
Below are the necessary materials and knitting instructions for you to duplicate this project.
Materials ·
- 50-gram ball of 100% mercerized cotton
- A set of five double-pointed 3-millimeter (US 3) needles
- Narrow, 4-millimeter (1/4-inch) elastic band, about 70 centimeters (28 inches), which is enough for a set of two covers
- Yarn needle
- Stitch markers (or pieces of any yarn in a different color)
- Scissors
Abbreviations
- Kfb means knit into the front loop and then into the back loop of the same stitch. This results in adding a stitch.
- St(s) means stitch(es)
Instructions Cast on 9 stitches, placing 3 stitches on each of three double-pointed needles. Join to work in the round, being careful not to twist the stitches. Place a stitch marker on the first stitch. This will mark beginning of a new round.
Round 1 — Knit.
Round 2 — Knit into the front loop and then into the back loop of the same stitch. Do this with each stitch (6 stitches per needle, 18 stitches total).
Round 3 — Knit.
Round 4 — Knit into the front loop and then into the back loop of the same stitch. Do this with each stitch (12 stitches per needle, 36 stitches total).
Round 5 to 7 —– Knit.
Round 8 — Knit 2 rows. Knit into the front loop and then into the back loop of the same stitch. Do this with each stitch. Repeat to end of round (20 stitches per needle, 60 stitches total).
Round 9 — Knit.
Round 10 — Knit 3 rows. Knit into the front loop and then into the back loop of the same stitch. Do this with each stitch. Repeat to end of round (20 stitches per needle, 60 stitches total).
Rounds 11 to 13 — Knit.
- Add one double-pointed needle, dividing the stitches evenly on 4 needles, 15 stitches each.
- Make sure to start the division after the marker (beginning of round).
- Thread the tail from the cast-on stitches on a yarn needle. Stitch through all of the cast-on stitches, pull up tight to close the hole in the middle, and stitch to secure. Weave the end to the wrong side and trim.
Round 14
- Needle 1 — Knit first stitch. Knit into the front loop and then into the back loop of the same stitch. Knit up to last two stitches, knitting into the front loop and then into the back loop of the same stitch. Knit last stitch. 17 stitches on the needle. Turn, purl back to end of Needle 1. Turn, knit 17 stitches. Continue to Needle 2.
- Needle 2 — Knit all 15 stitches. Continue to Needle 3. ·
- Needle 3 — Repeat instructions of Needle 1. 17 stitches. Continue to Needle 4.
- Needle 4 — Knit all 15 stitches. End of Round 14.
Round 15 — Knit.
Round 16 — Purl.
Round 17 to 24 — Knit 8 rounds.
Round 25 — Purl.
Round 26 — Knit whole round. Turn.
Round 27 — Purl whole round. Turn.
Rounds 28 to 29 — Repeat rounds 26 and 27.
Do not cast off.
Cut the yarn, leaving a tail in the length of 48 inches (120 centimeters). Thread the end of the tail on a yarn needle.
Fold inside, along last purl row, and stitch together (on wrong side of the cover) each stitch off the double-point needle and a stitch from fourth row before the purl row, until all stitches are off the needles.
Insert elastic band into the hem. Tie or sew together both ends, inserting them into the hem.
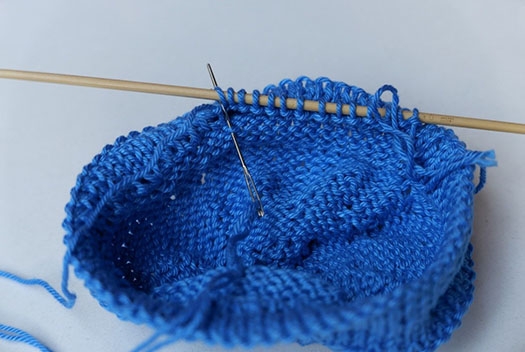
Figure 3 — Sewing the hem.
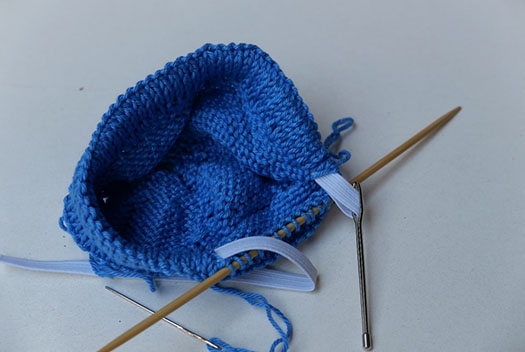
Figure 4 — Insertion of elastic band. It is preferable to use a narrow, 4-millimeter (1/4-inch) elastic band.
Daniel Rosenne, 4X1SK, received his Amateur Extra-class license in 1963. He is a Technion graduate in electronics engineering, and has an MBA from Hebrew University, Jerusalem. He is a retired Colonel with the Israeli Signal Corps, is chairman and board member of several high-tech corporations, and is the author of IARC (Israel Amateur Radio Club) 2020 Amateur Radio Examination Manuals.